WhatsApp:
+8613188899036
Correo electrónico:
[email protected]
Evite que su consulta retrase la respuesta, ingrese su WhatsApp/WeChat/Skype junto con el mensaje, para que podamos comunicarnos con usted lo antes posible.
Le responderemos en un plazo de 24 horas. Si para el caso urgente, por favor agregue WhatsApp: +8613188899036, o WeChat: 0531-87968777. O llame directamente al 0531-87968777.
* Respetamos su confidencialidad y toda su información está protegida. Solo utilizaremos su información para responder a su consulta y nunca le enviaremos correos electrónicos ni mensajes promocionales no solicitados.
Are your systems losing money? Do you worry about leaks, waste, or high energy bills? Many industries face this problema. Old systems have parts that do not talk to each other. They waste water, heat, and power. This waste grows over time. It makes your costs go up. It can even cause big failures. This is a big worry. You need a system that is smart, strong, and safe. You need a solución that puts you in control.
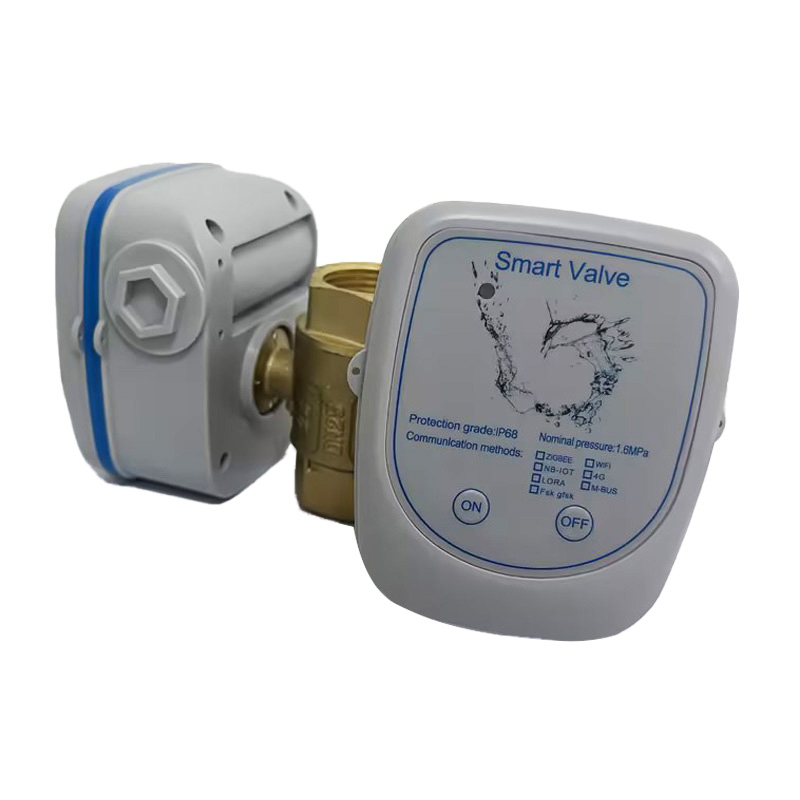
This guide is here to help. We will show you how to connect a válvula inteligente. This is a key part of a modern, efficient system. A válvula de agua inteligente can stop leaks before they grow. An válvula inteligente in a heating system can save huge amounts of energy. But getting the instalación de válvulas inteligentes right is very important. A bad setup can cause more problems.
This is where a trusted partner makes all the difference. Companies like Navarch are expert factories. They build intelligent devices and provide complete soluciones de válvulas. They focus on sistemas de control de ahorro energético. With advanced tools and five production lines, they can make up to 8,000 tons of valves each year. This guide uses that deep knowledge. It will give you a step-by-step guide to help you succeed. We will make it simple.
válvula inteligente
Good work starts with good planning. Before you touch a tool, you must check your system. This stops big mistakes.
Imagine trying to fit a square peg in a round hole. It will not work. If you connect a valve that is not right for your system, you create a big problema. The wrong valve can break under high pressure. It can leak dangerous fluids. It can stop your whole system from working. This is not just a small issue. It can be a safety risk. It can cost a lot of money to fix. This is why a compatibility check is your first and most important step.
You must be sure the valve fits your needs. This is where an experienced technical team, like the one at Navarch, provides value. They focus on making valves that meet strict quality rules. Every valve is tested many times before it leaves the factory. This ensures it will work perfectly for you.
You must check if the valve is right for your job. Look at these things:
This information is in the installation manual. Reading it carefully will prevent failure.
Having the right tools makes the job easy and safe. It is a problema when you have to stop and find a tool. It wastes time and can lead to mistakes. Get everything ready first.
Here is your setup checklist:
| Item | Why You Need It |
| Safety Gloves & Goggles | Protects your hands and eyes. Safety first! |
| Wrenches | To tighten connection fittings y mechanical fittings. |
| Teflon Tape | Para valve sealing to prevent leaks. |
| Multimeter | To check electrical power and signals. |
| Pressure Gauge | To test the pressure in your system. |
| Wire Strippers | To prepare wires for the connection terminals. |
| Isolation Valves | To stop the flow so you can work safely. |
Having these ready is a simple solución. It makes your valve assembly smooth and professional.
Now we will connect the valve. We will do this in three parts: the fluid pipes, the electrical wires, and the control system. Follow these steps for a safe and strong manual connection guide.
The first problema is making a leak-proof seal. A small drip can become a big flood. This can damage your building and equipment. The worry of a leak is always there if the connection is not perfect.
El solución is to do it right the first time.
This careful process for hydraulic connections o pneumatic connections ensures your system is secure. A strong factory, like Navarch, makes this easier. They are in a travel hub, so they can get you the right connection adapters and parts quickly. They help you get the parts you need for your valve placement instructions.
Bad wiring is a serious problema. It can damage the válvula inteligente. It can be a fire risk. It can make the valve not respond. This makes the “smart” valve not smart at all. The fear of an electrical mistake is real.
El solución is to follow the wiring diagrams exactly.
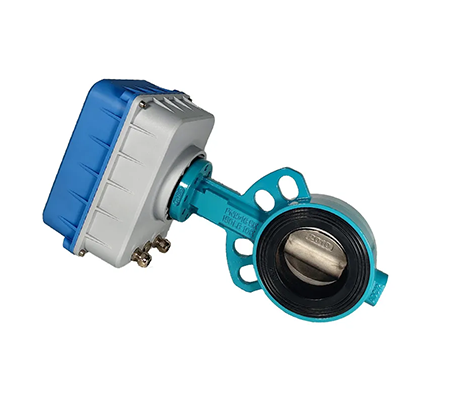
Good wiring is key for all válvula eléctrica types, from a simple válvula solenoide to a complex válvula motorizada. An válvula de bola eléctrica o válvula de mariposa eléctrica needs correct power to work.
Su válvula inteligente is smart because it connects to a brain. This brain is your control system. The problema is that different systems speak different languages. If your valve and your controller do not speak the same language, they cannot work together. This can be very frustrating. You have a smart system, but you cannot control it.
El solución is to use the right communication protocols.
Este software integration is what makes the valve truly smart. Navarch offers full system help. They do not just sell valves. They provide servicios tecnológicos de ahorro energético. They help make sure your smart features are all enabled and your automation compatibility is perfect. You can learn more about their advanced válvulas inteligentes that use modern protocols.
Your valve is connected. Now you must teach it how to work in your system. This is called calibration.
An uncalibrated valve is like a car with a bad steering wheel. It will not go exactly where you want it to. It might not close all the way, causing a small leak. It might not open enough, reducing the flow. This wastes energy and makes your system work poorly. This hidden waste can add up to big costs.
El solución is a careful system calibration. This tunes the valve to your exact needs.
Este plunger valve calibration ensures precision positioning. Many modern actuadores de válvulas have an actuador de válvula eléctrica that makes this easy. There are even electrical valve actuator models with auto-calibration. These are some of the smart valve benefits.
Even with a perfect setup, things can sometimes go wrong. The problema is that you do not know what is wrong. Is it the power? The signal? The valve itself? This can be a big headache.
El solución is a simple troubleshooting checklist. This helps you find and fix the issue fast. Here are some common issues and how to solve them with valve troubleshooting.
| Asunto | Quick Fixes |
| Valve Not Responding | 1. Check the power supply with a multimeter. 2. Look for loose wires. 3. Make sure the control system is sending a signal. |
| Fluid Leaks | 1. Turn off the flow. 2. Check all connection fittings y hydraulic couplings. 3. Re-apply sealant and tighten the connection. |
| Communication Failure | 1. Check your network connection. 2. Make sure the valve and controller are using the same interface protocols. 3. Restart the valve and the controller. |
| Valve is Noisy | 1. Check for air in the line (for liquids). 2. Make sure the valve alignment is correct. 3. Check the par de válvulas settings. |
Having good troubleshooting tools and a clear plan makes fixing problems much easier. This is where quality manufacturing shines. A well-made valve from a factory like Navarch, which performs many hard tests, is less likely to have problems. Their focus on long-term reliability means you can trust their products.
Su válvula inteligente is working. But the job is not done. Good maintenance keeps it working well for a long time.
Many people think that once a part is installed, they can forget about it. This is a big problema. Small issues can grow over time. A seal can wear out. Dirt can build up. This leads to a slow drop in performance. Your system becomes less efficient. Your energy bills creep up. Then, one day, a small problem becomes a big, expensive failure.
El solución is a simple plan for mantenimiento de válvulas. This protects your system and saves you money.
Technology is always getting better. You can add more smart parts to your system over time.
By choosing a flexible system, you can keep making it better. A great partner will offer a wide range of products, from an auto balancing valve to a high-tech válvula motorizada, giving you many ways to improve. You might start with a simple válvula de control eléctrica and add more features later.
You have a big problema: old systems that waste money and cause worry. The constant fear of leaks, high bills, and breakdowns is real. This guide has shown you the solución: a well-planned and carefully installed válvula inteligente system.
By following this smart valve connection guide, you have built a system that is efficient, safe, and reliable.
Let’s review the key steps:
The world is moving to smarter systems. Data shows that these systems work.
| Métrica | Mejora | Razón |
| Installation Speed | 25-45% faster | Guided steps reduce mistakes. |
| Costos de mantenimiento | ~30% lower | Valve diagnostic tools predict problems. |
| Failure Rates | 68% lower | Pre-set troubleshooting finds issues fast. |
| Eficacia | Up to 55% leak reduction | Smart control stops waste automatically. |
These numbers show the power of smart technology. By choosing high-quality parts and following this guide, you can see these benefits too. For the most advanced soluciones de válvulas, look for partners who are not just sellers, but expert makers. A factory like Navarch, with its huge capacity, experienced team, and focus on quality, provides the strong foundation you need for a truly smart and reliable system.